In Australian community laboratories, the handling of skin cancer specimens, while largely standardised, exhibits significant variations that have profound implications for clinical decision-making and patient outcomes. Clinicians’ understanding of these histopathological processes enhances diagnostic precision, informs surgical margin evaluations and refines management approaches. Understanding specimen handling and laboratory protocols is vital for accurate pathological interpretation, enabling targeted treatment strategies. This knowledge promotes effective collaboration between clinicians and pathologists, which is crucial for optimising patient care in skin cancer treatment. Such insights are essential for navigating the complexities of diagnosis and ensuring best practice standards are maintained.
Laboratory processing of skin specimens for evaluation
Couriers collect specimens from referring clinicians, along with pathology request forms, and deliver them to the laboratory. Tissue specimens are then separated from other pathology samples and directed to the histopathology laboratory. Here, a scientist removes the specimens from their bags, ensuring the information on the request form matches the demographic and specimen site details on the specimen container. The quantity, type and size of the specimens, along with the clinical information provided, allow the scientist to prepare a corresponding number of tissue cassettes, each marked with a unique identification number. These cassettes will later contain the specimen, either in full or in selected samples, for tissue processing.
During the tissue-sampling step, colloquially known as ‘cut-up’, specimens, request forms and cassettes are prepared for subsequent stages. The specimens are removed from their containers, and both the specimens and any identifiable lesions are described and measured. Excision margins are inked to aid microscopic identification later. Small specimens, like punch biopsies or curettage specimens, are typically transferred directly from the container to the cassette. Larger specimens, however, are sliced to fit within the cassette, usually not exceeding 25 mm in length and 3 mm in thickness, to ensure proper processing. Depending on their size, one or several slices are placed in an individual cassette (Figure 1).
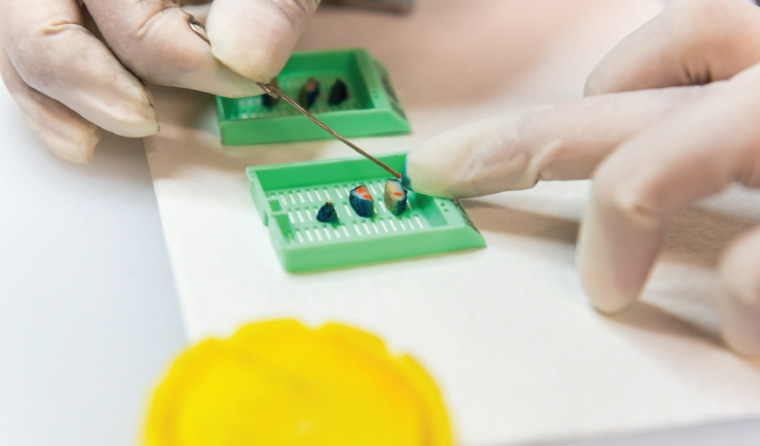
Figure 1. Slices of an elliptical skin excision specimen placed in sequence into tissue cassettes.
Significant variation exists in the protocols used for sampling skin cancer specimens in Australian laboratories, especially in the extent of tissue examination.1 Approximately one-third of laboratories cut the specimen into parallel slices around 3-mm thick, spanning the entire length of elliptical specimens. Another one-third of laboratories apply a similar slicing method but do not sample the entire specimen. The remaining laboratories similarly sample the visibly affected parts of the lesion and additionally obtain longitudinal sections from the ellipse’s poles but discard intervening tissue. These differences in sampling might account for the very low recurrence rates for skin cancer reported by some centres.2
The variability in sampling techniques leads to discrepancies in the volume of tissue analysed, a factor pivotal for assessing margin involvement. Logically, sampling margins at 3-mm intervals, characteristic of the parallel slicing method, enhances the likelihood of detecting margin involvement compared with methods that entail discarding some of the tissue and, consequently, potentially missing the involvement of margins. This delineation between techniques underscores the importance of method selection in the accurate evaluation of surgical margins.
Next, lids are placed on the cassettes, which are then loaded in batches into an automated tissue processor to prepare the samples for the subsequent creation of microscopy slides. This instrument executes a sequence of fluid exposures designed to preserve and stabilise the specimens while rendering them amenable to sectioning. Fixation is completed, using formalin that diffuses through the tissue to conserve the cytoarchitecture. Dehydration is then accomplished using a graded series of alcohol baths of increasing concentration. Extracting aqueous fluid allows molten paraffin wax to infuse the tissue thoroughly during later infiltration. Intermediate clearing baths utilise solvents such as xylene to extract residual alcohol and optical-clarify the tissues, thereby facilitating uniform wax impregnation. Finally, incubation in liquefied paraffin wax allows the specimens to become entirely embedded in a supportive matrix that, upon solidification, permits the creation of microscopy sections. The time required for each of these steps varies depending on the size of the specimens and the amount of fat they contain, but the entire cycle averages four to eight hours.
The processed tissue cassettes are transferred to an embedding station equipped with a heated paraffin reservoir designed to liquefy the infiltration medium. Here, a scientist carefully extracts the tissue from its cassette and positions it within a steel mould, considering sample type and orientation requirements that will permit optimal microscopic visualisation. Punch biopsies are laid horizontally to allow transverse sectioning across the specimen plane. Shave biopsy specimens are oriented perpendicular to the mould floor, enabling longitudinal sections that demonstrate the entire tissue length. Elliptical slices are arranged sequentially in coplanar fashion to reconstruct anatomic continuity. Once embedded, the mould is flooded with molten paraffin wax before it is sealed with the cassette now acting as a cap. This embedding phase requires considerable technical skill to position diverse specimen types for subsequent characterisation. Finally, the mould is immediately placed on a cold plate, both to accelerate wax solidification, which maintains the tissue orientation, and to provide a robust embedding matrix suitable for the production of tissue sections.
Once the wax has solidified, the tissue embedded in the wax matrix, with a base provided by the cassette, is designated as a ‘tissue block’. This tissue block is then removed from the mould and placed within a clamp in a device known as a microtome. The microtome, a precision instrument, enables the creation of a ribbon composed of extremely thin (2–5-µm) sections of both wax and tissue by moving the tissue block across the edge of a razor-sharp blade in minute increments (Figure 2). In the preparation of microscopy slides, it is customary practice to discard several tissue sections until a complete face of the tissue is revealed. Once this has been accomplished, a ribbon of sections is transferred to a water bath, where it is laid to float on the surface. A glass slide, labelled with the patient’s name, the specimen identification number and other details, is submerged into the water beneath the tissue, which is subsequently floated onto the slide (Figure 3).
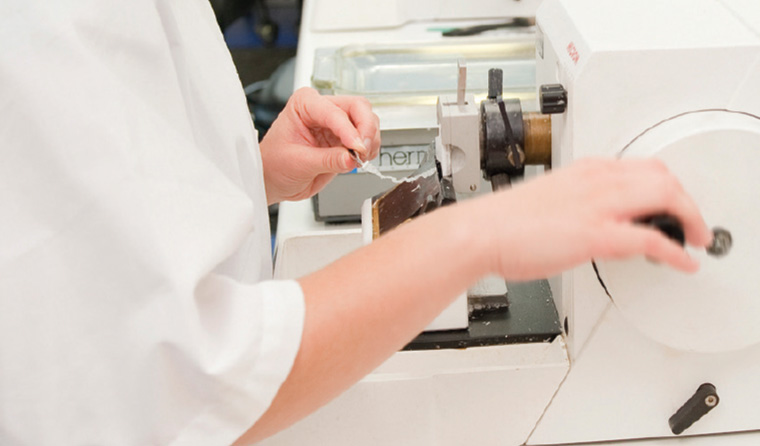
Figure 2. The histology scientist has produced a ribbon of tissue sections using a microtome.
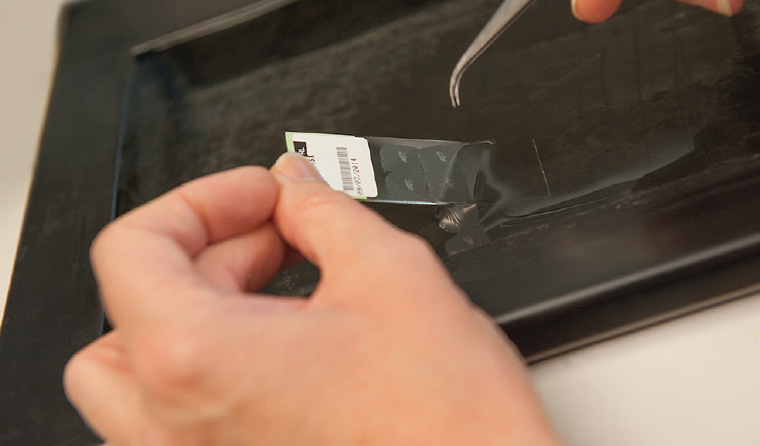
Figure 3. Sections of tissue are floated onto a microscopy slide prior to staining.
As previously noted, different laboratories have varying protocols for the handling of suspected skin cancer specimens, and this also applies to the generation of tissue sections. For example, some laboratories routinely cut several sections from punch biopsy specimens onto one or more slides, with a variable number of intervening sections discarded. These sections, produced at regular intervals, are known as levels.
After a batch of slides has dried, they are ready for staining. Routine microscopy of skin specimens utilises haematoxylin and eosin staining, which is usually performed in an automated staining machine. This involves the removal of residual wax, staining with haematoxylin (a blue dye that selectively imparts colour to nuclei), counterstaining with eosin (a pink stain that stains, inter alia, cytoplasm), succeeded by steps of dehydration and optical clarification to enhance visual clarity. A thin sheet of glass or plastic film is placed on top to produce an optically flat surface. The slides are visually inspected with the remaining tissue in the tissue block to confirm that the slide correctly corresponds to the tissue block and with the specimen description recorded during sampling. Several slides, from one or more specimens and cases, are assembled on a slide tray for delivery to the pathologist (Figure 4).
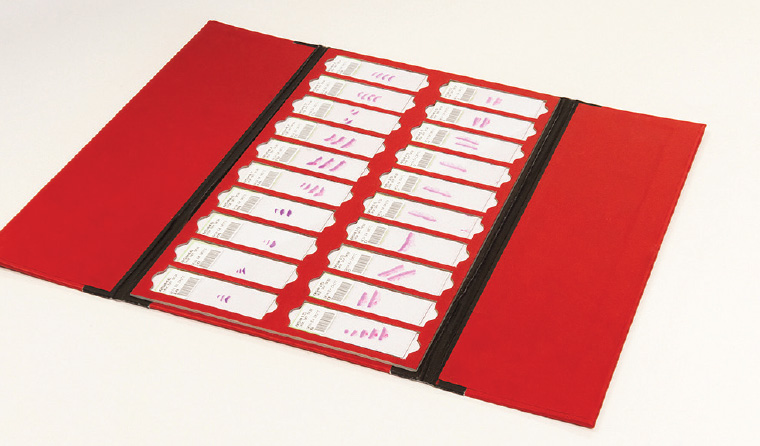
Figure 4. A tray of haematoxylin and eosin-stained slides from several different specimens collated for histopathological evaluation.
Having received the slides from an individual patient episode, the pathologist identifies and records the three cardinal elements of a skin pathology report: the diagnosis, observations regarding prognostic features and, where applicable, the status of the excision margins.
In most cases, a diagnosis can be rendered through either a process of pattern recognition or of feature analysis and the remaining elements reported, using the initially created slides. In a sizeable minority of cases, however, further steps are required. If, for example, a full face of the tissue is not present on the slide or if a lesion is not sufficiently represented, additional sections can be created by returning the tissue block to a microtome and cutting more sections. Because these sections are further from the initial surface, they are known as ‘deeper levels’ or ‘sections’.
In other instances, a lesion might require additional investigation to highlight or determine its architecture, extent or histogenesis. These investigations most frequently utilise histochemical or immunohistochemical stains. As an example, a case of a melanoma might require a histochemical stain to confirm the presence of melanin pigment and immunohistochemical stains with antibodies to Sox10 (a sensitive and fairly specific marker of melanocyte nuclei) to confirm the presence of melanocytes, the cells that produce melanin pigment. Immunohistochemical stains are often deployed in a panel for complete evaluation of a lesion.
Once the pathology report has been issued, there is a standard requirement that any unprocessed tissue is retained for one month; that slides, blocks and reports be retained for a minimum of 10 years; and that processed paediatric specimens be retained in perpetuity. This allows further evaluation if the clinical circumstances evolve or if additional investigations are required.
Conclusion
This overview describes how histopathology laboratories process skin specimens for diagnosis and highlights the effects of procedural variations in laboratories on the assessment and management of skin cancer. It points to the need for deeper clinician understanding of laboratory processes for optimal skin cancer management.
Key points
- Clinicians’ knowledge of histopathology improves evaluation of pathology reports.
- Laboratory protocols for tissue sampling vary, affecting skin cancer specimen handling.
- Evaluating only a small specimen sample can miss some pathological features.
- Retention of slides and tissue blocks allows for further investigation or re-evaluation.
- Pathologists can use ancillary techniques to reveal additional pathological information.